
Today I'm going to show you how
to create graphical interface for Arduino (Using visual studio C#)

Part
1 – C# program using visual studio
If you are not someone
who are not familiar with visual studio yet get it with here.
- · first open the visual studio and go to File à New àProject

- · Then go to Visual C# à Windows and select Windows Forms Application. then give a project name ,location and select Ok

- Then the following window will be appeared.

- You can drag and drop toolbox items into Form1. As an example I took 2 buttons.
- Arduino
and visual studio are communicating with each using serial communication. Therefore
make sure to drag and drop serial port in toolbox item. Unless you will
get errors in compile.


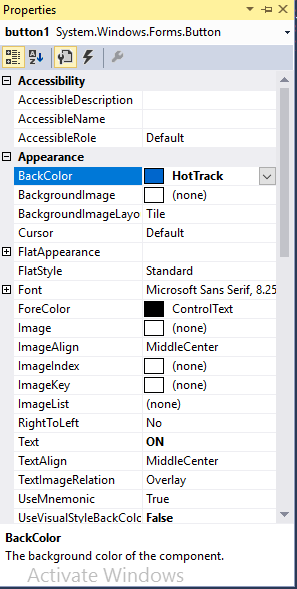
- · Right click on button and go to properties.
- · The properties window will appeared. You can change button name, color and other properties as your wish.
- Double
click on button and go to Form1.cs file and
edit the code as follows
============================================================
using System;
using System.Collections.Generic;
using System.ComponentModel;
using System.Data;
using System.Drawing;
using System.Linq;
using System.Text;
using System.Threading.Tasks;
using System.Windows.Forms;
namespace ArduinoLedOnOff
{
public partial class Form1 : Form
{
public Form1()
{
InitializeComponent();
serialPort1.Open(); // open the serial port
}
private void
button1_Click(object sender,
EventArgs e)
{
serialPort1.Write("ON"); // pass string value from serial port
}
private void
button2_Click(object sender,
EventArgs e)
{
serialPort1.Write("OFF");// pass string value from serial
port
}
}
}
===============================================================
- Now the first part is over
which was regarded visual studio. Let’s move to the Arduino coding part.
Part
2 – Arduino coding
- Open the
Arduino IDE and write the following code
==============================================================
String data;
void setup() {
Serial.begin(9600);
pinMode(13,
OUTPUT);
}
void loop() {
if(Serial.available()){
data=Serial.readString();
if(data=="ON"){
digitalWrite(13, HIGH);
}
if(data=="OFF"){
digitalWrite(13,
LOW);
}
}
}
==============================================================
Part 3 - Circuit Diagram

Now all coding parts are finished.
- Then go to Aduino IDE à Tools à Port and check the port number

- Then
upload the Arduino code.
- Next
go to visual studio and Right click on Serial
Port and go to properties.

- Then change the port name similar to Arduino port name.

- finally run to visual
studio.


- Thank you very much for reading this tutorial.
- If you have problems regarding this tutorial feel free to make a comment below or contact us by sending message through our facebook page or by sending email to this address progtpoint@gmail.com
- Follow us on facebook and Twitter also subcirbe us youtube


 )
This helped me a lot Thank you !
ReplyDeletethank you great work
ReplyDeleteThank You For This Great Tutorials. Keep It Up.
ReplyDeleteThank You For This Great Tutorials. Keep It Up.
ReplyDeleteThank You For This Great Tutorials. Keep It Up.
ReplyDeleteIt it great work!!!! will there be a continuation of the project?
ReplyDeleteGreat Content. It will useful for knowledge seekers. Keep sharing your knowledge through this kind of article.
ReplyDeleteAzure Training in Chennai
Spark Training Institute in Chennai
Microsoft Azure Training in Chennai
Spark Training Academy Chennai
Azure Courses in Chennai
Spark Course in Chennai
Best Azure Training in Chennai
Good blog!!! It is more impressive... thanks for sharing with us...
ReplyDeleteHow to Use Selenium in Python
Learn Selenium with Python
>>>>> Download Now
ReplyDelete>>>>> Download Full
>>>>> Download LINK
>>>>> Download Now
>>>>> Download Full
>>>>> Download LINK pl