

Let's display an image using OpenCv in visual studio. Our previous tutorial was Load and Display Image.
Let’s start creating an
image.
First open visual studio
and create a new project.
The following examples
will guide you in creating the image
Example
1
#include "opencv2/highgui/highgui.hpp"
#include <iostream>
using namespace std;
using namespace cv;
int main(int argc, const char**argv) {
Mat img(500, 1000, CV_8UC1, Scalar(70));
Mat img1(500, 1000, CV_8UC3, Scalar(10, 100, 150));
Mat img2(500, 1000, CV_8UC4, Scalar(100, 10, 100, 180));
if (img1.empty()) {
cout << "load erro" << endl;
return -1;
}
namedWindow("1_channel", CV_WINDOW_AUTOSIZE);
namedWindow("3_channel", CV_WINDOW_AUTOSIZE);
namedWindow("4_channel", CV_WINDOW_AUTOSIZE);
imshow("1_channel", img);
imshow("3_channel", img1);
imshow("4_channel", img2);
waitKey(0);
return 0;
}
Explanation

Image
size: you may select any height and width as your
preference
Image
Channels & depth: you
may choose image channels and depth as per your requirements from the
followings
For single channel
images
CV_8U
(8 bit unsigned integer) : 0 ~255
CV_8S
(8 bit signed integer) : -128 ~127
CV_16U
(16 bit unsigned integer) : 0 ~65535
CV_16S
(16 bit signed integer) : -32768~32767
CV_32S
(32 bit signed integer) : -2147483648~2147483647
CV_32F
(32 bit floating point number) : -1.18*10-38~3.40*10-38
CV_64F
(64 bit float floating point number):
For multi-channel images
CV_8UC2 (2 channel array with 8 bit unsigned integers)
CV_8UC3 (3 channel array with 8 bit unsigned integers)
CV_8UC4 (4 channel array with 8 bit unsigned integers)
CV_8UC(n) (n channel array with 8 bit unsigned integers (n is in
between 1 to 512) )
Example 2
#include "opencv2/highgui/highgui.hpp"
#include <iostream>
using namespace std;
using namespace cv;
int main(int argc, const char**argv) {
int a,b,c;
char x;
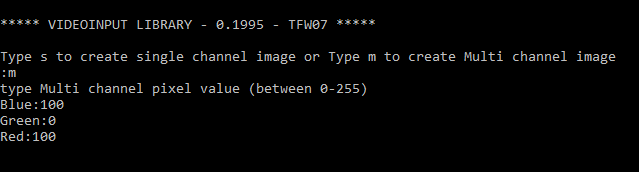
cout << "Type s to create single
channel image or Type m to create Multi channel image " << endl;
cout << ":";
cin >> x;
if (x == 's') {
cout << "type Single channel pixel
value (between 0-255)" << endl;
cin
>> a;
Mat img(500, 1000, CV_8UC1, Scalar(a));
namedWindow("1_channel", CV_WINDOW_AUTOSIZE);
imshow("1_channel", img);
}
else if (x == 'm') {
cout << "type Multi channel pixel
value (between 0-255)" << endl;
cout << "Blue:";
cin >> a;
cout << "Green:";
cin >> b;
cout << "Red:";
cin >> c;
Mat img1(500, 1000, CV_8UC3, Scalar(a, b, c));
namedWindow("3_channel", CV_WINDOW_AUTOSIZE);
imshow("3_channel", img1);
}
else {
cout << "Enter s or m" <<endl;
}
waitKey(0);
return 0;
}
You can test the code by giving different pixel
values. Some of outputs are as follow.
Output
1


Output
2


Output
3

- Thank you very much for reading this tutorial.
- If you have problems regarding this tutorial feel free to make a comment below or contact us by sending message through our facebook page or by sending email to this address progtpoint@gmail.com
- Follow us on facebook and Twitter also subcirbe us youtube


Learn how to create and display an image using OpenCV in C++ with just a few lines of code. This quick tutorial helps developers visualize output smoothly with CherriHosting powering their development environment.
ReplyDelete